This is a detailed topic in our support portal in the Using Hopp series and assumes that you have some prior knowledge or experience using Hopp. |
Quick overview
A team collaborating on the mapping in Studio, will share their work via the Studio Repository. Each user works on the mapping by adding, modifying and deleting items in a local workspace. This workspace is simply a folder (with subfolders) on the user's machine, and each item is persisted in an XML file in these folders.
When a user wants to modify an item, the user must check out the item from the repository. The checkout has these consequences:
- Studio places a lock in the repository, so no other user can check it out
- If the user does not have the latest version of the item in the workspace, Studio will automatically fetch the latest version
- Before the check out, the item is read-only (disabled) in Studio. But - once checked out - Studio will enable the item, allowing the user to make modifications
Once the user is done with modifying the item (and often other items) the user commits these changes back to the repository. For all the items being committed, Studio will
- Save the item back to the repository. This becomes the latest version - previous versions are retained
- Remove the lock on each item allowing other users to check them out
- In case an item was deleted, the commit will execute the deletion and remove the item from the workspace
- Added and modified items are set read-only in Studio (disabled) and cannot be modified unless checked out again
Of course, once there is more than 1 member in the team, it is very common that the workspace become outdated - or stale: Other users have checked in newer versions of items and the workspace does not get updated automatically. Studio will mark stale items. Executing a Get Latest Version from Studio will retrieve the latest version of all stale items.
Commits
Modified items are sent back to the Repository via Commits. A commit is a bundle of one or more modified items that as one unit are sent to the repository to create new versions of the items included in the Commit. The commit is treated as one transaction: Either all new versions are committed successfully or none at all.
Some advice on good Commits:
- Keep commits small. Large commits are difficult to understand and describe
- Make a commit a consistent change. If for instance you add a new Condition Rule and uses the new rule on a Target Object, commit the new rule and the modified Target Object together
- Strive to leave the project consistent with each commit. In the example above, avoid committing the new version of the Target Object without committing the new rule as this would leave the project inconsistent
Deletion
When an item is deleted, the commit of the deleted item simply creates a new version of the item. This new version is marked as deleted.

The figure above illustrates 3 commits:
| Commit 1 |
|
| Commit 2 |
|
| Commit 3 |
|
Commit message
A commit is accompanied by a message to describe the change that is being committed. Good commit messages are essential and should be required for all commits. Indeed, the default setting in the Repository Manager is to require messages on all commits. While it is possible to change this policy to make commit messages optional, it is highly recommended to refrain from doing so. Looking at the version history of a given item is after all vastly more meaningful if each version has a descriptive message.
The commit message should be to the point and accurately describe the commit. It is good practice to use imperative statements to signify what the commit does: Write 'Add account business object' rather than 'Added account business object''.
Reverting a commit
It is possible to revert a commit. This means that Studio will inspect the commit to be reverted, and for each item in the commit, find the version that was previous to the commit being reverted. Studio will then create a new commit to create new versions of the items equal to the previous versions. If the commit being reverted added an item, the new commit will create a delete-marked version for this item.

| Commit 1 |
|
| Commit 2 (reverts Commit 1) |
|
Repository State indicators
Studio marks the repository state as the left-most icons in the project Explorer treeview:

The entire collection of possible indicators is here:
 | Checked in The item is checked into the Repository. If you open the item on the Document canvas, it is locked and you cannot modify anything. In order to unlock the item so you can modify it, you must first check it out of the repository. |
 | Checked In, Stale The item is checked in (as above) but another user has committed a new version of the item so your workspace no longer contains the latest version |
 | Checked out by you The item is checked out to you, so you - and only you - can modify it. No one else in your team can check this item out while you have it checked out |
 | Checked out by someone else Another member of your team has checked this item out in order to modify it. If you hover your mouse over the state icon, you will see a tooltip containing the user id of the other team member. As an aside, it can actually also be yourself, if you have opened the same project in a different folder or on another machine and checked the item out there |
 | Checked out by someone else, Stale Checked out by someone else (as above) but another user has committed a new version of the item so your workspace no longer contains the latest version |
 | Added You have added this item but not yet checked it in to the Repository. At the moment, only you can see this item - nobody else. If other team members do a Get Latest from the Repository, they will not get this item. Check it in to join the club! |
 | Pending delete You have deleted the item. The delete is pending, waiting for you to commit your changes to the Repository. Once you commit, the item will disappear |
 | Deleted in Repository Another user has deleted this item and committed the delete to the Repository. You still have the item locally in your workspace. Delete the item locally or do a Get Latest on the parent on the Project Explorer. |
What about git (or others)?
Since each team member is, in fact, using Studio to modify items that are persisted as xml files in a local folder structure, there is nothing blocking the use of git or other source control solutions. However, the XML files produced by Studio are quite complex and ripe with internal references based on internal id's. Resolving eventual merge conflict can be intimidating.
We take pride that Studio empowers people with knowledge of the business and data involved, and does not require its users to be developers well versed in source control and the complexities involved. This is why the Studio workflow is simple and straightforward as explained above. That being said, git (or others) can easily be brought into play to handle scenarios outside the daily work in Studio.
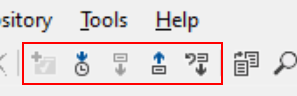
Repository actions
There are quite a few actions related to the repository. Many are accessible from the Project Explorer and the Main Menu and Toolbar as shown below. Other actions, such as reverting a commit or undeleting an item are accessible from detail views, more on this further on.
| Project Explorer Context menu | Main Toolbar | Main Menu |
 |  |  |
The total list of repository actions is:
 | Get Latest Version (Recursive) |
| This action recurses the entire sub-tree of the selected item and compares the local workspace version with the latest version in the Repository. If the versions are different, the latest version is fetched from the Repository and saved in the local workspace. Items that have been deleted in the Repository but still exist in the workspace will be deleted from the workspace |
 | Checkout |
| Displays a dialog to select the items to check out. The dialog displays the entire sub-tree of the selected item to enable the selection of the items to check out. |
 | Commit |
| Displays a dialog to select the items to commit. The dialog displays the entire sub-tree of the selected item to enable the selection of the items to include in the commit. |
 | Undo Checkout |
| Displays a dialog to select the items to undo. The dialog displays the entire sub-tree of the selected item to enable the selection of the items to undo |
 | View History |
| Opens a new document on the document canvas displaying the version history of the selected item. Here it is possible to compare different versions of the item and revert a given commit |
 | Repository |
| This action is only available on the root node (for the entire project). It opens a new document on the document canvas. This document contains
|
 | Compare with latest version |
| If an item is checked out, this action compares the local version with the latest version in the Repository |
 | Add project to Repository Control |
| Add a locally created, new project to the Repository |
 | Clean up Working Folder |
| Deletes all items in the local workspace and gets latest version of everything from the Repository |
 | Repository Manager |
| Opens a new document on the document canvas with the Repository Manager. The Repository Manager has 3 tabs
|
Pending changes
The Pending Changes tool window lives on the left edge of the Studio window (unless of course you undock it and move it to somewhere else). Hover the mouse over the Pending Changes tab to expand the tool window:

Use the checkboxes in the treeview to compose the commit, write a good commit message and click the Commit button to send the commit off to the Repository.
Item deletion
Deleting an item is a 2-step process:
- At first, deleting the item marks it as deleted in Studio and also checks out the item for deletion. It follows that it is not possible to delete an item that is checkout to somebody else
- When you commit, the item is deleted from you workspace and from Studio and the deletion is committed to the Repository.
Deleting an item
| User A | Other users |

| 
|

| 
|
Deleting a child item in the Target Map
In the Target Map, parent items contains references to all their child items. In order to delete a child item, the parent item must be checked out
| User A | Other users |

| 
|

|
|

| 
|

| 
|
Item Comparison
When an item is committed to the Repository, Studio of course stores the xml document defining the new version. This document is generally quite complex, contains an abundance of internal reference is and and does not lend itself well to comparisons. To accommodate for comparison of item versions, Studio also stores the new item version as a readable string. Contrary to the exact xml representation, this readable string is suitable for comparison.
Item compare is a very versatile tool making it quick and easy to pinpoint the exact differences between 2 versions of the same item. Below and example, where the Severity has been modified on the System Event connected to a flag on a Target Object Condition Rule:

Item History
Select the  View History... item from the Project Explorer treeview to open a document on the document canvas displaying the version history for the item.

| 1 | The list displays the versions in reverse chronological order
| ||||||||||||||||
| 2 | The selected commit is displayed. The commit display shows all the items contained in the commit | ||||||||||||||||
| 3 | Compare two versions. If only one version is selected in the list, the compare will be with the previous version. Select 2 versions to compare these | ||||||||||||||||
| 4 | Revert the entire commit. This will show a dialog to supply the message for a new commit. The new commit will revert the selected commit:
| ||||||||||||||||
| 5 | Restore only the selected version of the item | ||||||||||||||||
| 6 | The commit message can be updated |
 in this column marks a deletion
Project view
Select the  Repository... menu item on the root node in the project Explorer to open the Repository View on the document canvas.
History tab

| 1 | The list displays all the commits for the project
| ||||||||||||||
| 2 | Displays the selected commit | ||||||||||||||
| 3 | Set the Label of the selected commit | ||||||||||||||
| 4 | Create a new project copy based on the selected commit. Copies can be used to 'freeze' a given project. For instance if you use your source map to export data to a third party and wish to freeze a copy of your Source Map that corresponds to the data agreed with the third party. | ||||||||||||||
| 5 | Roll back the entire project to the point in time signified by the commit. This will create a new commit containing the item versions prior to the selected commit |
News tab
Contains a list of all your stale items = items, where your local version is behind the latest version in the Repository.

Deleted tab
Contains a list of all the items that has been deleted.

Locks tab
Contains a list of all the current locks in the Project. Unlock will remove the lock from the Repository (=force undo checkout on behalf of the user).

| Undo... | If a lock belongs to the current user, the user can launch the normal Undo Checkout dialog from here |
| Unlock... | If a lock belongs to another user, the current user can delete the lock. Bear in mind, that the original owner of the lock will now have lost the check out of the item, but still have the item unlocked and editable in the local workspace. Thus the original user will be able to modify and save the item locally, but will not be able to check in the local modifications |
Copies tab
Contains a list of all the copies of the current project. The purpose of a project copy is to save a frozen state of the project to keep for the duration of a migration that must not be influenced be further development of the project. The typical example is when you use Hopp to export your own data in an off-boarding project. The exported data will at a point be delivered to the receiving party who will begin testing on these data. At that point, your Source Map should be frozen so you don't suddenly deliver data different for the expectations of the receiving party.
It may anyway become necessary to modify the frozen copy (due to requirements in the ongoing off-boarding project). These modifications to the frozen copy are called Drift. The Copies tab will show the drift for a project copy. In some cases it may be necessary to alter the current project, in other cases the drift is very specific to the off-boarding project and should not be taken into account in the current project.
To mark that the drift of an item has been reviewed, the item drift can be set Handled.

| 1 | The list displays the copies of the current project
| ||||||||||||
| 2 | The list shows the items that has drifted in the selected project copy
| ||||||||||||
| 3 | Compares the latest version of the item in the current project with the latest version of the item in the project copy | ||||||||||||
| 4 | Opens the item in the current project | ||||||||||||
| 5 | Supply a comment to set the modification handled | ||||||||||||
| 6 | Delete the project copy. This only mark the project as deleted. To remove it completely, purge it from the list of deleted projects in the Repository manager (see below) | ||||||||||||
| 7 | Change the title of the project copy |
 The item was added in the copy
 The item was modified in the copy
 The item was deleted in the copy
 if the modification has been handled in the current project.
Repository manager
The repository manager can be found in the Studio main menu in the Repository sub-menu. The manager opens as a document in the document canvas. Use the Repository Manager to delete and purge projects from the Repository and to set Repository policies.
Projects tab
The projects tab lists all the projects in the Repository.

| 1 | The list displays all the projects in the Repository
| ||||||||||||
| 2 | Delete the selected project. This removes the project from the Projects tab and adds it to the Deleted Projects tab. Users will not be able to fetch deleted projects from the Repository |
Deleted Projects tab
The tab list all the deleted projects in the Repository.

| 1 | The list displays all the projects in the Repository
| ||||||||||||||||
| 2 | Restore the selected project. This removes the project from the DeletedProjects tab and adds it to the Projects tab | ||||||||||||||||
| 3 | Purges the project from the Repository. This action is irreversible and cannot be undone. Use with caution! |
Policies tab

Set the Commit message policy. It is highly recommended to require a message on all commits.
Was this article helpful?
That’s Great!
Thank you for your feedback
Sorry! We couldn't be helpful
Thank you for your feedback
Feedback sent
We appreciate your effort and will try to fix the article